Introduction: The Importance of Accurate PEMB Scheduling
Over the last several years, pre-engineered metal buildings have become increasingly popular for their cost effectiveness and erection speed in comparison to other building structures like CMU and tilt-up concrete.
As a result, design professionals are turning to PEMB’s in their designs we have more general contractors who are required to submit schedules prior to having their PEMB under contract and firm dates established.
We’ve put together this post to help contractors, construction managers, and design professionals gain a better understanding of the PEMB lifecycle and ease some of the headaches that come with inaccurate schedules.
Key Phases in the PEMB Erection Process
Planning and Preparation
The first step to getting your PEMB produced is to settle on a design and get it approved with the manufacturer. Your PEMB contractor will take the architectural set of plans and detail it with the PEMB manufacturer to fit your use case. Common mistakes we see at this stage are:
- Bay spacing greater than 30′. Standard PEMB’s bay spacings are below 30′, this is the greatest span possible without special considerations, and additional cost, to the building design.
- Incomplete architectural plans. Unlike with structural steel designs that can be modified until near the time of construction, once a PEMB order is submitted to the manufacturer, structural changes, like adding a roof load or changing bay spacing, restarts the engineering process and thus the production schedule.
The phase from building order to getting permit drawings is normally two to three months depending on the time of the year and manufacturer workload.
Through this phase, keep these points in mind:
- Manufacturers won’t guarantee any timeline until the building order is submitted.
- Permit drawings received from the manufacturer are the minimum required details needed for the building permit, not final drawings.
Foundation Work
Once the permit is approved, the foundation can go in. Most PEMB’s don’t provide anchor bolts but most PEMB contractors will upon request. Make sure you have the anchor bolts covered in either the PEMB or foundation contractor’s scope.
Key considerations for this stage:
Verify anchor bolt placement.
This is one of the most common foundation problems. Correcting the anchor bolts is easy but takes time. It’s best to verify it before the foundation contractor leaves the jobsite and prevent it from holding up the PEMB construction.
Concrete curing times.
Ensure you account for plenty of curing time in the schedule prior to PEMB erection, typically 7-10 days. Building frames cannot be set on the anchors prior the concrete curing or you risk cracking or busting the foundation.
Slab installation.
Often times you’ll want to install your underground utilities and pour the interior slab while the concrete contractor is on site and you’re waiting on your building. Most of the time you do not want to do this. PEMB frames are heavy and the equipment to erect them needs to get close to the center of the building during erection. Unless you’re working on a building with the slab engineered for heavy equipment, leave it out until after the PEMB is erected.
Building Delivery
Unlike with other construction methods, PEMB components come as one “kit” rather than multiple deliveries on an as-needed basis. Due to this you’ll need to plan for a storage area close to the jobsite to hold the materials until they’re ready to be installed.
NOTE: Final building plans are normally received a few weeks before the building delivery.
Try to locate your storage area where:
- It won’t require moving the material throughout the construction process.
- Is close to the building site and provides access to it with the material handling equipment.
The storage area should be as close to the building location as possible while providing at least 50′ of clearance all around the building to move equipment around during erection.
The PEMB Erection Process
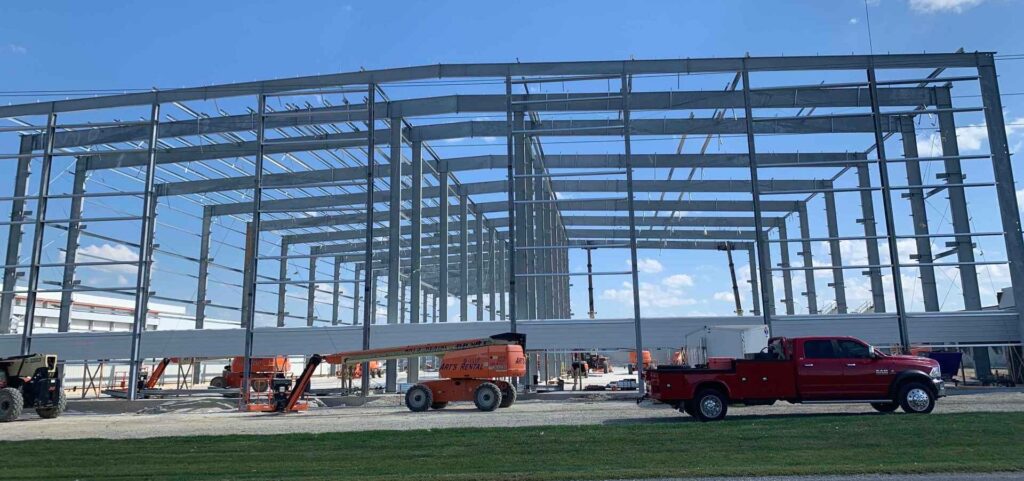
Structure Assembly
This is the first and the fastest part of the PEMB erection process. The steel mainframes and secondary framing members are installed and ready for coverings.
The most important thing to keep in mind at this stage is that the erection equipment is heavy and you’ll need a solid bulding pad for the equipment to maneuver on. If the pad is not a hard surface or stone, it’s likely that any rain will ruin the pad and prevent erection from moving forward until the pad it stabilized.
Once this is complete, the heaviest equipment can be removed from inside the building and the interior slab poured, assuming you don’t have any other fixtures or finishes requiring the equipment.
Roof Panels and Insulation
Roof panels and roof insulation are normally completed in parallel to prevent insulation from being exposed to the elements. Depending on your panel and insulation selections, this is often the longest item to complete and most dependent on good weather.
Weather is the largest consideration at this stage, noteably wind and rain. The roof cannot be installed during rain or winds. Even gusty days can prevent crews from safely installing roof panels.
Wall Panels
Following roof panels, the wall panels are installed, and the building is dried-in. Though not as sensitive as the roof panel installation, the walls are dependent on fair weather to install safely.
Openings
Lastly the doors and windows are set. Depending on your application, this may or may not be in the PEMB contractor’s scope. The PEMB will be framed and trimmed to accept the doors and windows from the inside, allowing the general contractor to install them when it best suits the schedule.
Post-Erection: Final Touches & Inspections
After erection, the final structural inspections can be completed. Almost always the permitting authority will require this be completed by a third-party inspector and the report included in the documents during the final inspection.
Inspectors will primarily visually inspect the frames and spot check bolt tightness throughout the building. Most inspectors will want a lift available for them to use during the inspection.
Common Pitfalls
The most common pitfalls we see on construction schedules can easily be avoided if addressed early in the process. When planning your project keep these most common pitfalls in mind:
- Agree on a design and stick with it once it’s ordered.
- Plan for bad weather.
- Don’t install underground or slabs that obstruct heavy equipment.
- Allow plenty of space to move equipment and material around the jobsite.
Conclusion
A successful PEMB erection requires careful planning, coordination, and realistic scheduling. Knowing the common erection process and common pitfalls helps avoid costly delays and ensures the project stays on track.
We’re Here to Help
We at Diverse know that a successful project starts with a solid plan. With 20 years of experience in all steel and hybrid steel pre-engineered metal buildings, we’re here to help.
If you’re unsure about your current schedule or need expert guidance to ensure your PEMB erection goes smoothly, don’t hesitate to reach out. Our team is here to provide support, answer your questions, and help you build your project on time and within budget.
Contact us today to get your PEMB project started on the right foot!